How to Dewinterize Your RV in Idaho: The Complete Guide (Plus Where to Camp First)
Why Dewinterizing in Idaho Is Different
Here’s something most RV manuals won’t tell you: The dewinterization process you learned in a YouTube video filmed in Arizona doesn’t apply in Idaho.
Idaho has freeze-thaw cycles that’ll wreck your plumbing if you’re not careful. We’ve got elevation changes that affect water pressure. And we’ve got a spring season that arrives in Boise by late March but doesn’t show up in McCall until May.
If you dewinterize your RV too early, you’ll deal with frozen lines during a late-season cold snap. If you wait too long, you’re missing prime camping season at places like Ponderosa State Park and Mirror Lake.
So let’s talk about how to actually do this right.
I’m going to walk you through the complete dewinterization process, tell you when to do it based on where you live in Idaho, show you common mistakes that cost people thousands of dollars, and give you the best spots to test your rig once it’s ready to roll.
And if you’re new to RVing, I’ll show you which beginner-friendly rigs are perfect for Idaho camping and where to find them locally.
Let’s jump in.
The Complete Dewinterization Process (Step-by-Step)
This process comes from years of trial and error, combined with advice from RV tech John Marucci. I’ve adapted it specifically for Idaho conditions.
Tools and Supplies You’ll Need
Before you start, gather these items:
- Household bleach (the cheap stuff works fine)
- Measuring cup
- Gallon jug
- Small funnel
- Water filter (this matters more in Idaho than you think)
- RV water hose
- City water connection
Don’t skip the water filter. Idaho has hard water in most areas, and you don’t want mineral buildup in your freshwater tank right out of the gate.
Part 1: Sanitize the Freshwater Tank and Plumbing System
Step 1: Un-Bypass the Hot Water Tank
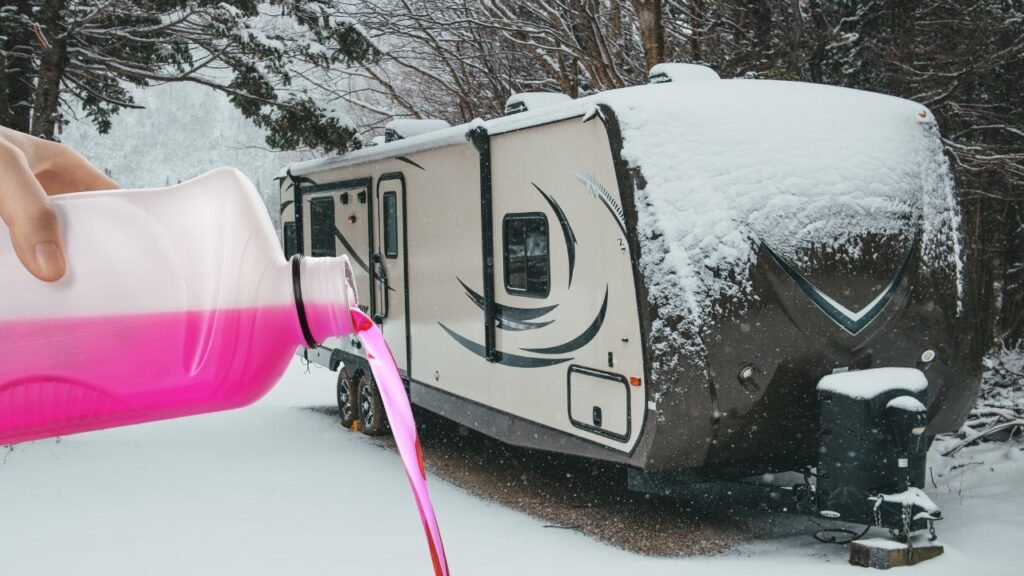
If you winterized your RV last fall (or paid someone to do it), your hot water tank is probably still bypassed. This was done so pink RV antifreeze wouldn’t sit in the tank all winter.
Now it’s time to un-bypass it.
Here’s how:
Go outside and find your hot water heater cover. It’s usually a small rectangular panel on the exterior of your RV. Once you locate it on the outside, you’ll know approximately where the tank is inside.
Inside the RV, remove the access panel. You might need a screwdriver. Look for the bypass valve (or valves, depending on your setup). When the valve is “un-bypassed,” it should point in line with the hot water tank. This allows water to flow into the tank.
If you’re not sure which way the valve should point, here’s the rule: If the valve handle is parallel to the water line going INTO the tank, water can flow. If it’s perpendicular (sideways), it’s bypassed.
Turn the valve so it’s parallel. Done.
Step 2: Mix the Bleach Solution
Now you’re going to sanitize your entire plumbing system with a bleach solution.
Here’s the formula: 1/4 cup of household bleach per 15 gallons of freshwater capacity.
So if you have a 30-gallon freshwater tank, use 1/2 cup of bleach. If you have a 45-gallon tank, use 3/4 cup.
Here’s the process:
- Fill your freshwater tank about 1/3 full using your RV water hose and water filter. (Yes, use the filter. Idaho water can be gnarly.)
- In a gallon jug, mix your measured bleach with water. For a 30-gallon tank, that’s 1/2 cup bleach in a gallon of water.
- Use a funnel to pour the bleach solution into your freshwater tank. This might take a few minutes. Don’t spill it on your clothes or skin.
- Once the bleach solution is in the tank, fill the rest of the tank with filtered water.
Your freshwater tank is now full of diluted bleach solution. Good.
Step 3: Fill the Hot Water Tank
Go inside your RV and turn on the water pump.
This will start filling your hot water tank with the bleach solution. If you have a 6-gallon hot water tank, this will take a few minutes. You’ll know the tank is full when the water pump stops running on its own. The system should be pressurized at that point.
Step 4: Drain the Pink RV Antifreeze from All Lines
Leave the water pump on.
Now go to each faucet in your RV and run both the hot and cold sides until you see bleach solution coming out. Here’s what will happen:
At the kitchen sink:
- Turn on the hot water. Pink antifreeze will come out first (if that’s what you used to winterize). The faucet might spit and sputter as air gets pushed out of the lines.
- Eventually, you’ll get a steady stream of water. You should smell bleach. That means the bleach solution is flowing through the hot water lines.
- Turn off the hot water.
- Turn on the cold water. Again, pink antifreeze first, then bleach solution.
Repeat this process at:
- Bathroom sink (hot and cold)
- Shower/tub (hot and cold)
- Toilet (flush until you see clear bleach solution, not pink antifreeze)
- Outside shower, if you have one (hot and cold)
- Any quick-connect water hookups
This step is critical. You’re purging all the antifreeze from your lines and replacing it with bleach solution that will sanitize everything.
Step 5: Let the Bleach Solution Sit
Turn off the water pump.
Here’s something important: Don’t leave bleach solution sitting on your toilet seal. It can damage the rubber. Manually pour some fresh (non-bleach) water into the toilet to rinse the seal.
Now refill your freshwater tank to make up for any water you used in the previous step.
Let the bleach solution sit in your plumbing lines for 3 to 6 hours.
This is where most people mess up. They’re impatient. They run bleach through the lines for 30 seconds and call it good.
Don’t do that. The bleach needs TIME to sanitize. Leave it overnight if you can.
Part 2: Flush the Plumbing System to Remove Bleach Solution
Step 6: Drain the Freshwater Tank
After 3 to 6 hours (or overnight), go outside and open the drain valve on your freshwater tank. Let it drain completely. This will take several minutes depending on your tank size and drain plug.
Step 7: Drain the Hot Water Tank
Make sure your water pump is OFF.
Go outside and open the hot water heater cover. Locate the pressure release valve on the water heater.
Now crawl under your RV and find the low-point drain valves. There should be one for hot water and one for cold water. Open both of them. You’ll see a little water start to drip out.
Go back to the water heater and open the pressure release valve. This allows air into the tank so it can drain properly. You should hear the hot water tank start to empty, and you’ll see more water coming out of the low-point drain valves.
Let the tank drain completely. This takes a few minutes.
Once it’s empty, close the low-point drain valves. Close the pressure release valve on the water heater. Close the water heater panel.
Step 8: Flush the Plumbing System with Fresh Water
Now you’re going to run fresh water through all your lines to rinse out any remaining bleach solution.
Fill your freshwater tank again (with filtered water). Turn on the water pump.
Run water through:
- Kitchen sink (hot and cold, for at least 10 seconds each)
- Bathroom sink (hot and cold)
- Shower/tub (hot and cold)
- Toilet
- Outside shower
- Quick-connect hookups
Here’s what I do: I flush the system twice. After the first flush, I drain the freshwater tank again, refill it, and run water through all the faucets a second time. This ensures there’s no bleach taste left in the lines.
Some people are fine with one flush. I’ve found two flushes eliminate any bleach smell or taste.
Step 9: Rinse Using the City Water Connection
Connect your RV to city water (or a garden hose with a pressure regulator and water filter). Make sure you use a pressure regulator. Without it, you could blow out your plumbing connections.
Run water through all the faucets again using city water pressure. This final rinse ensures everything is clear.
Step 10: Check for Leaks
With the city water still connected and your plumbing system under pressure, do a visual inspection.
Go back to your hot water heater compartment. Look at all the connections around the tank. Look for drips, wet spots, or puddles. Check the area around your water pump. Check under sinks.
If you see leaks, tighten the connections. If a connection still leaks after tightening, you might need to replace a washer or fitting.
If everything looks dry, you’re good. Close up the hot water heater compartment. Disconnect the city water line.
Your RV is now dewinterized.
Common Mistakes Idaho RVers Make (And How to Avoid Them)
Let me tell you about the mistakes I see every spring.
Mistake #1: Dewinterizing Too Early
I get it. It’s 60 degrees in Boise in late March, and you’re itching to go camping.
But here’s the problem: It might be 60 in Boise, but it’s still 25 degrees at night in McCall. If you dewinterize your RV, take it to Ponderosa State Park in early April, and a cold snap hits, your freshwater lines can freeze.
You just undid all your winterization work.
The fix: Know your camping destination. If you’re staying in the Treasure Valley (Boise, Meridian, Caldwell), you can dewinterize your RV by late March…well maybe not this year. Winter of 2026 has been one for the books. If you’re heading to McCall, Stanley, or Island Park, wait until mid-May.
Always check the 10-day forecast for nighttime lows at your destination. If it’s dipping below 32°F at night, wait.
Mistake #2: Skipping the Water Filter
Idaho has hard water. Boise’s water isn’t terrible, but places like Twin Falls and Pocatello? Brutal.
If you fill your freshwater tank with unfiltered city water, you’re dumping minerals and sediment into your plumbing system. Over time, this builds up and clogs your water pump and faucet aerators.
The fix: Always use a water filter when filling your freshwater tank. You can get a good inline filter for $30 at any RV supply store.
If you’re buying an RV and need parts or supplies, check out Dennis Dillon RV or Bretz RV & Marine in the Boise area. They carry filters, hoses, and everything else you’ll need.
Mistake #3: Not Testing the Hot Water Heater Before Your First Trip
You dewinterized. You sanitized. You’re ready to camp.
You get to Ambassador RV Resort in Caldwell, hook up, and realize your hot water heater doesn’t work.
Now you’re taking cold showers, and your spouse is not happy.
The fix: Before your first trip, run your hot water heater for 20 minutes. Make sure it’s heating water. If it’s not working, you’ll find out in your driveway, not at the campground.
If you’re not comfortable troubleshooting RV systems yourself, take your rig to a service center. Bish’s RV of Meridian and Uncharted Recreation both have service departments that can handle pre-season checkups and can dewinterize your RV.
Mistake #4: Forgetting to Check Tire Pressure
Tires lose pressure over the winter. If your RV has been sitting for 5 months, your tires are probably 10 to 15 PSI low.
Driving on underinflated tires causes blowouts. I’ve seen it happen on I-84 heading to Twin Falls. It’s not fun.
The fix: Check your tire pressure before your first trip. Inflate to the manufacturer’s recommended PSI (it’s on a sticker inside your RV, usually near the door).
While you’re at it, check the age of your tires. If they’re more than 5 years old, consider replacing them, even if the tread looks fine. RV tires age out from UV exposure and sitting still, not just mileage.
When to Dewinterize Your RV (By Idaho Region)
Not all of Idaho thaws at the same time. Here’s when to dewinterize your RV based on where you plan to camp.
Treasure Valley (Boise, Meridian, Caldwell, Nampa)
When to dewinterize: Late March to early April
The Treasure Valley warms up fast. By late March, overnight lows are consistently above freezing. You can safely dewinterize and start camping at local spots like Ambassador RV Resort or the Boise/Meridian KOA Journey.
Just keep an eye on the forecast. If a cold snap is coming, wait a week.
Southwestern Idaho (McCall, Cascade, Donnelly)
When to dewinterize your RV: Mid-April to early May
McCall gets snow into April. Ponderosa State Park is gorgeous, but if you show up in early April, you’re gambling with freezing temps at night.
Wait until mid-April at the earliest. By early May, you’re safe.
Eastern Idaho (Idaho Falls, Rexburg, Island Park)
When to dewinterize your RV: Late May to early June
Island Park is stunning, but it’s at 6,300 feet elevation. It can snow in May.
If you’re planning a trip to Red Rock RV Park near Yellowstone, don’t dewinterize until late May. Better yet, wait until June.
Idaho Panhandle (Coeur d’Alene, Sandpoint, Priest Lake)
When to dewinterize: Late April to early May
The Panhandle is beautiful, but it stays cold longer than the Treasure Valley. If you’re heading to Mirror Lake Hipcamp in Sagle, wait until late April.
By early May, you’re in the clear.
Where to Test Your Rig First: The Best Shakedown Campgrounds Near Boise
You’ve dewinterized your RV. Everything works (you think). Now you need to test your rig before heading deep into the backcountry.
Here are the best “shakedown” campgrounds near Boise. These are spots where you can work out any kinks before committing to a remote location.
Ambassador RV Resort (Caldwell)
Why it’s perfect for testing: Full hookups, close to town, easy to get parts if something breaks.
Ambassador is one of the nicest RV parks in the Treasure Valley. It’s clean, well-maintained, and has full hookups (water, electric, sewer). The sites are level, concrete pads with plenty of room.
If your water heater stops working or your fridge won’t cool, you’re 10 minutes from a parts store or RV service center.
Price: Around $70/night.
Book here: Ambassador RV Resort
Boise/Meridian KOA Journey
Why it’s perfect for testing: Close to Boise, full amenities, easy in-and-out access.
This is the most convenient option if you live in Boise or Meridian. It’s only 6 miles from downtown Boise, so if you realize you forgot something, you’re not far from home.
The downside? The sites are tight. Like, really tight. You’re camping in an urban setting with highway noise in the background.
But for a one-night shakedown trip? It’s perfect.
Price: Varies, typically $50 to $80/night.
Book here: Boise/Meridian KOA
Important note: This KOA is tight. If you have a 35-foot fifth wheel, you’ll be inches from your neighbor. It’s not the place for a relaxing weekend, but it’s great for testing your systems.
Ponderosa State Park (McCall)
Why it’s perfect for testing: Beautiful location, full hookups available, real camping experience.
If you want to test your RV in an actual mountain camping environment, Ponderosa State Park is the spot.
It’s on a peninsula on Payette Lake, and the views are incredible. The dedicated RV campground near the main entrance has 50 sites with full hookups (water, 30/50 amp electric, and sewer).
This is where you’ll find out if your furnace works at altitude, if your water pump can handle demand, and if your grey tank capacity is sufficient for off-grid camping.
Price: $37 to $71/night depending on the site.
Book here: Ponderosa State Park
Best RVs for First-Time Idaho Campers (And Where to Find Them Locally)
If you’re new to RVing, you don’t need a 40-foot luxury fifth wheel. You need something that’s easy to tow, easy to set up, and won’t bankrupt you if something breaks.
Here are the best beginner-friendly RVs for Idaho camping, all available at Boise-area dealers.
1. Forest River R-Pod (The Perfect Starter)
Why it’s great for beginners: Lightweight, compact, easy to tow with a half-ton truck or SUV.
The R-Pod is one of the most popular entry-level travel trailers for a reason. It’s small (most models are under 20 feet), light (under 3,500 lbs dry weight), and has everything you need without the complexity of larger rigs.
You can tow an R-Pod with a Toyota 4Runner, Ford F-150, or even a Jeep Wrangler (depending on the model and your towing capacity).
Where to find it locally:
- Uncharted Recreation has R-Pods in stock.
- Bobby Combs RV also carries Forest River models.
Idaho use case: Perfect for weekend trips to Craters of the Moon, Bruneau Sand Dunes, or dispersed camping in the Boise National Forest.
2. Keystone Bullet (Lightweight and Affordable)
Why it’s great for beginners: Affordable, towable with most half-ton trucks, solid build quality for the price.
Keystone makes reliable, no-frills travel trailers that won’t fall apart after one trip down a gravel road. The Bullet series is their lightweight line, and it’s popular with first-time buyers who want something simple and dependable.
Most Bullet models have full kitchens, bathrooms, and sleeping for 4 to 6 people. They’re not fancy, but they work.
Where to find it locally:
- Legacy Powersports carries Keystone in Boise.
- Uncharted Recreation also stocks Keystone models.
- Happy Camper RV has a selection as well.
Idaho use case: Great for family camping at Ponderosa State Park or longer trips to Island Park.
3. Coleman Lantern Series (Budget-Friendly)
Why it’s great for beginners: Cheap, simple, gets you camping without a huge investment.
If you’re not sure RVing is for you, don’t spend $50,000 on your first trailer. Get a Coleman Lantern.
These are basic, lightweight travel trailers designed for people who want to try RVing without breaking the bank. They’re not built like Arctic Fox rigs (not even close), but they’ll get you out camping while you figure out if this lifestyle is for you.
Where to find it locally:
- Camping World has Coleman trailers.
- Uncharted Recreation also carries them.
Idaho use case: Weekend trips to local campgrounds while you figure out if you want to upgrade later.
4. Airstream Basecamp (If Budget Allows)
Why it’s great for beginners: Bulletproof quality, holds resale value, small enough to tow easily.
If you have the budget, an Airstream Basecamp is the best entry-level RV you can buy. Period.
It’s small (16 to 20 feet depending on the model), lightweight (around 3,500 lbs), and built like a tank. Airstreams hold their value better than any other RV brand. If you decide RVing isn’t for you, you’ll get most of your money back when you sell it.
The downside? They’re expensive. A new Basecamp starts around $50,000 to $60,000.
But if you can afford it, you won’t regret it.
Where to find it locally:
- Boise Airstream is the only Airstream dealer in the area.
Idaho use case: Perfect for couples or solo travelers who want to explore Idaho’s backcountry without worrying about repairs.
5. Jayco Jay Flight SLX (Lightweight and Reliable)
Why it’s great for beginners: Solid reputation, lightweight construction, good warranty support (when it works).
Jayco is one of the most popular RV brands in America, and the Jay Flight SLX is their lightweight travel trailer line. These rigs are designed to be towable with half-ton trucks, and they come with decent warranties.
That said, Jayco’s quality control has been hit-or-miss in recent years (as we covered in the previous article). But when you get a good one, they’re solid rigs.
Where to find it locally:
- Bish’s RV of Meridian is a major Jayco dealer.
- Uncharted Recreation also stocks Jayco models.
Idaho use case: Family camping at Ponderosa State Park, weekend trips to Lava Hot Springs, or extended stays at full-hookup RV resorts.
Search All RV Dealers in the Boise Area Now
Search results may vary due to how dealer websites display inventory. For questions, contact hello@rvdealersboise.com
Should You DIY Dewinterization or Pay a Dealer?
This is the question everyone asks.
Here’s my honest answer: If you’re comfortable working on your RV, do it yourself. It takes 2 to 3 hours, and you’ll save $150 to $300.
But if you’ve never dewinterized an RV before, or if you’re not confident in your ability to diagnose problems, pay a dealer to do it the first time. Watch what they do. Ask questions. Then do it yourself next year.
What dealers charge for dewinterization:
- Basic dewinterization (sanitize tanks, check for leaks): $150 to $250
- Full spring prep (dewinterize + safety inspection + tire check + brake check): $300 to $500
Where to get it done locally:
- Bish’s RV of Meridian has a full-service department.
- Bretz RV & Marine offers spring prep packages.
- Dennis Dillon RV also does dewinterization services.
- Uncharted Recreation can handle it as well.
Call ahead and ask what’s included. Some dealers just sanitize your tanks. Others do a full safety inspection, check your brakes, inspect your roof, and test all your appliances.
If you’re paying for dewinterization, get the full package. It’s worth it.
Where to Camp First: My Top Picks for Your First Trip of the Season
You’re dewinterized. Your RV is ready. Now where do you go?
Here are my top picks for first trips of the season in Idaho.
For First-Timers: Ambassador RV Resort (Caldwell)
If this is your first RV trip ever, start here.
Ambassador has full hookups, clean facilities, and a friendly staff. If something goes wrong, you’re close to town and can get help quickly.
It’s not wilderness camping, but it’s a safe place to learn how your RV works.
Book here: Ambassador RV Resort
For Families: Ponderosa State Park (McCall)
If you have kids and want a real camping experience, Ponderosa State Park is perfect.
The RV sites have full hookups, but you’re surrounded by forest and lake views. There are hiking trails, swimming areas, and plenty of space for kids to explore.
Book here: Ponderosa State Park
For Couples: Mirror Lake Hipcamp (Sagle)
If you want quiet, stunning views, and a peaceful atmosphere, head to Mirror Lake.
This spot has been voted one of the top campgrounds in Idaho. It’s on a gorgeous lake, away from crowds, with fishing, kayaking, and hiking nearby.
Some sites have electric hookups (sites B, C, and D), but not all sites have full hookups. Check when you book.
Book here: Mirror Lake Hipcamp
For Adventurers: Craters of the Moon / Arco KOA (Arco)
If you want to explore something unique, head to Craters of the Moon National Monument.
The landscape is unlike anywhere else in Idaho. It’s volcanic, otherworldly, and fascinating. The Arco KOA is about 3 hours from Boise and serves as a great basecamp.
Book here: Craters of the Moon / Arco KOA
For Yellowstone Lovers: Red Rock RV Park (Island Park)
If you’re planning a Yellowstone trip, Red Rock RV Park is the spot.
It’s about 30 miles from the west entrance of Yellowstone, has full hookups, and recently remodeled sites. This is a great place to test your RV before heading into the park.
Book here: Red Rock RV Park
Final Thoughts: Get Your RV Ready and Get Out There
Learning how to dewinterize your RV isn’t complicated. It just takes time and attention to detail.
Follow the steps in this guide, avoid the common mistakes, and test your rig at a local campground before heading deep into the backcountry.
And if you’re new to RVing, don’t overthink it. Get a simple, reliable RV like a Forest River R-Pod or Keystone Bullet, dewinterize it (or pay a dealer to do it), and book a weekend at Ponderosa State Park or Ambassador RV Resort.
You’ll figure out the rest as you go.
Idaho has some of the best camping in the country. Don’t let fear of dewinterization keep you from experiencing it.
Ready to find your next RV? Check out local Boise dealers like Bish’s RV, Uncharted Recreation, Dennis Dillon RV, and Bretz RV & Marine for inventory and service.
Now get out there and camp.

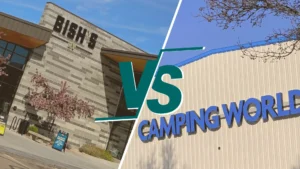
The Ultimate Meridian RV Showdown: Your Complete Guide to Shopping at Bish’s RV vs. Camping World

Boise RV Dealer Guide: An Honest Look at Every Dealership in the Treasure Valley
How to Tow Your RV Safely Through Horseshoe Bend, Idaho (Without Using the Runaway Truck Ramps)